Tuesday, September 17, 2013
It's been a while....
So it's been a while since I've been on here, but I promise more quilts in the near future. I've also tried some recipes out that I'm going to be sharing. My best friend is getting married in 11 days so I have a looooonnnggg road trip to New Hampshire to work on all things new and exciting!

Tuesday, August 13, 2013
Gianna Quilt
Here's the finished product of the quilt I was working on in the previous posts:
.JPG)
.JPG)
.JPG)
.JPG)
.JPG)
.JPG)
WELCOME BABY GIANNA!
Sunday, July 21, 2013
Bruschetta Chicken
I've been obsessively craving bruschetta recently so I decided to find a recipe thanks to pinterest to fulfill my craving as well as provide a nice meal for fiance and I. The original source/recipe is located here: Bruschetta Chicken. It was a simple recipe: simple breading on the chicken, mix bruschetta and mix topping. The product turned out absolutely delicious, however, it dirtied way too many dishes to my liking and took longer than I want to commit to dinner on a day to day basis. It also looked nothing like the picture shown... it looks like some portion was grilled in the picture yet nothing in the recipes mentions grilled anything. I forgot to get a picture of my final product but it looked like baked chicken with some croutons and tomatoes on top. I would highly recommend the recipe based on taste. I'm highly lazy in the kitchen so anything that requires more than 3 steps is too much work for me so if you're like me you'd probably only want to make this if you're feeling ambitious.
Here's the picture from the flickr recipe to give you some food porn, but like I said mine did not look like this, enjoy anyway!

Here's the picture from the flickr recipe to give you some food porn, but like I said mine did not look like this, enjoy anyway!

Monday, July 15, 2013
Binding Tutorial
So, I know most people like the idea of making a quilt but don't really know how to finish the edges once the get there. A popular way to bind is to just buy binding tape sew over and you're done. My way is a little more complex but I think it gives it a nicer finish. I don't know if this is the "proper" way to bind a quilt, it's just the way I've been taught how to do it. So the first step is to cut your binding fabric.


I choose to do mine in two inch strips, this is again a matter of preference. I find once I fold it over it's just the right amount of fabric left over to work with. If you've never done binding on a quilt you may want larger strips, if you're fairly comfortable or want a very tight binding you could go smaller. Make sure you have enough strips to go around the perimeter of your quilt. Next you take your strips and you're going to want to sew them together. The best way to do this is a diagonal seam.

You will lay two strips together the bottom is right side facing up, top is right side facing down (I didn't pick the best fabric for his tutorial sorry guys!) You'll start at the top left corner and make a seam down to the bottom right corner. You want to do a diagonal seam rather than just sewing the ends together because it makes it less bulky, creating a more uniform look overall. Here's what it looks like when you open it up:

Next you'll want to fold in half and iron in place:

Then you'll sew around the perimeter of your quilt. I usually start somewhere in the middle of one side.


So when you get to the corner you'll stop about 1/4 inch from the end. Leave your needle down but raise your presser foot and turn your quilt folding over the binding like shown below:

Once the binding is sewn in place you'll fold it over to the back and begin hand stitching it in place. I trim down excess fabric/batting as I go but you could do it before if you prefer. So the way I hand stitch is I take a thread or two of the grey and then in the folded part of the pink fabric, it creates a perfect little ledge for the thread to sit, let the thread hide in that pocket go 1/4 inch or so down.

Below shows about how far apart the stitches are:

So to be honest, I've never been great with corners but I approach them the same way as attaching the binding. I sew right up to the corner, then leaving the needle in fold the corner over and have the needle go through the end of the new side and continue hand stitching.


Below are the finished pictures of the binding to give you an idea of how the finished product looks:


HAPPY QUILTING!
Friday, June 21, 2013
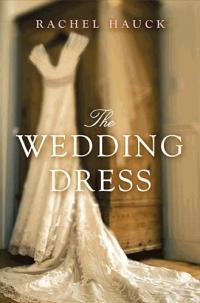
Happy Ever After and The Wedding Dress
So, apparently I have wedding fever or something of the sort because I just finished reading two wedding related books. The first was Happy Ever After by Nora Roberts and the second I listed to as an audiobook called The Wedding Dress by Rachel Hauck.


Overall, two great books to try and cure my wedding fever...
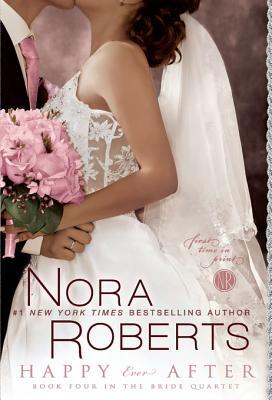
Happy Ever After is the last book in the Bride Quartet series. This series was great for quick and relaxing reads. However far-fetched some of the stories might be they're almost like modern day fairy tales and are cute and charming. I especially liked this book best because I semi-related to Parker and her need to plan out everything. Now she does it to extreme, but I've always been a planner myself. I also like Malcolm's rough edge, what girl doesn't like a bad boy? If you're looking for a happy ending kind of story this is a good one.
The Wedding Dress on audiobook was fabulous. I love how different the reader made the characters come alive and very unique. The story drew me in too, and I loved how there was a little bit of mystery and both stories begin to come together. One story takes place in the present with Charlotte and the other about 100 years ago with Emily. Charlotte is a bridal gown store owner and is in turmoil over her own engagement and Emily is engaged to a big-shot mine owner and is having to choose between someone she loves and her status. Both stories I felt were well developed and I connected with both girls. I loved the extended layers as well, how all these women were connected by this dress. I loved the playfulness of this book and trying to figure out things as charlotte did.
Overall, two great books to try and cure my wedding fever...
Wednesday, June 19, 2013
Start of Guestbook Quilt
I'm getting married in about two years from today and I decided that I wanted a guestbook quilt pretty much right off the bat. I'm an avid quilter for about 5 years now so I loved the idea of making something that I already love to make that we'll have forever. I knew I wanted to do something I could use a lot of my scraps for because 1) I use up my scraps and 2) there are little pieces of all the quilts I've made for others in this quilt. I found a pattern for what's called a "Double Wedding Ring Quilt" and figured this is the perfect option. I had seen the pattern in the past and didn't care for it because I tend to like more modern designs, however I saw this picture:


on pinterest and I was drawn in by the bright colors and figured I could mimic it with my own bright colors as well as same batiks. I found a free pattern here. I decided to start on the quilt now because well if you take a look at the pattern there are 1500+ little pieces I need to cut out. Needless to say it's gonna take some time just to cut out all the needed pieces. Here's my progress so far:

only about 1400 pieces to go! Woot!
Anyway, there will be updates as I go as I'm sure I'll have many trials and tribulations with this pattern seeing as I've never done anything of the type before. I'm hoping I'll love it as much as I think and that my guests will love it too and be able to find pieces of their quilts in it.
Monday, June 17, 2013
Warming Megan's house
One of my best friends just moved into a house a few doors down from me (very exciting!). So I decided to put together a little housewarming gift for her consisting of the makings for awesome cupcakes. Who doesn't love cupcakes right? Here's a picture of what I put together:


a new cupcake tin, a mixing bowl, cake mix (confetti cake), Funfetti frosting with sprinkles, and zebra print cupcake liners. I hope she likes her gift and it warms her house! Any other neat ideas for house warming gifts or care packages?
Subscribe to:
Posts (Atom)